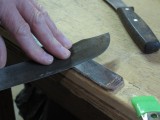
I am often asked to recommend a knife sharpener. There are many different sharpeners on the market today and it seems every month brings a new take on how to sharpen knives. I am not going to go over every type or model of sharpener here, a few minutes (or hours, as is often the case) research on the web can give you that.
I will start at the simplest setup for home use requiring the least amount of skill to use and work up to the more complicated set-ups. If you want to sharpen knives on a more professional level, that is a different discussion, and won’t be covered here.
Please note that I am not endorsing any of these products, nor am I receiving any kind of compensation from or have a special relationship to any manufacturer (other than that of consumer). These are just my personal opinions based on my experiences both sharpening tools since I was a kid and from teaching others how to sharpen.
The Ceramic Rod
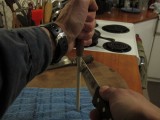
Probably the simplest sharpening set up I would recommend is a white ceramic rod. Ceramic sharpening rods come aprox 10-12” long and about ¾” in diameter, with a wooden or synthetic handle. This will look almost exactly like the steel common found with kitchen knife sets, but with a ceramic rod in place of the steel rod.
Ceramic rods are very fine grit and can be found at most kitchen supply or cutlery stores or on the web and run about $25-$40. The brand is less important than making sure that the rod is smooth with no nubs or chips.
Being a very fine abrasive, the ceramic rod can be used to touch up your knife’s edge between major sharpenings, or can serve as your primary sharpening tool. Since it is a fine grit, it will only take off a small amount of metal each pass so major sharpening will take a bit longer than with a courser grit tool.
Based on the same basic principal as the ceramic rod mentioned above, but more refined with some technology thrown in would be the Sharpmaker by Spyderco.
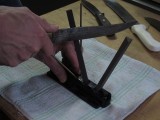
This sharpener comes with a base that holds the ceramic rods fixed at two angles, 15 and 30 degrees for primary and secondary edge bevels. The fixed angles allow much more control in the sharpening process.
Two different grits of ceramic rod are included in the basic kit, course and fine so you can do each phase of sharpening. The ceramic rods are also triangular in shape so the points of the triangle can be used for more aggressive abrading, and the flats can be used for finishing. The triangular shape of the rods also help when sharpening serrated edges.
The whole kit fits into the base, allowing ease of storage and transportation. The Sharpmaker can be used for complete sharpening, although very dull edges will take a while to hone completely.
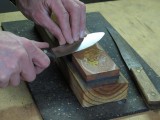
Benchstones are the next sharpening tool I would suggest considering. Either a fine/India combination stone by Norton or a Japanese style synthetic combination water stone. Water stones can also be purchased as separate grits by King or Dragon.
Sharpening with benchstones requires practice and skill as well as some setup and maintenance.
I would not consider any stone less than 8” long for most knife sharpening.
The variety of grits available in benchstones easily lend themselves to building a complete sharpening setup. Different grits and their combinations can be adapted to the user’s skill and learning curve.
Check back for a post on how to sharpen with benchstones in the future.
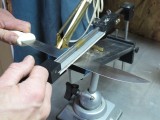
My final recommendation for this discussion would be the EdgePro sharpener by Edgepro. I consider this to be the one of if not the best professional sharpener set up currently available, but I might be biased due to the over 15 years I have been regularly using mine.
The Edgepro does have a learning curve, and is not cheap in both senses of the word, but if you do a lot of sharpening, or want the best, you will not regret picking one up. I also don’t think it is overpriced or too complicated for the average person to learn how to use well.
The Edgepro has a wide range of grits that can be used during sharpening, and is adjustable for a wide range of edge shapes, sizes and angles.
Note that there is a more basic model called the Apex. This one has the same approach as the Pro, but is less expensive and simpler in design, and more reasonable for occasional home use.
The other sharpener, more of an accessory, I would recommend you consider, would be a strop. This could fit in right above the basic ceramic rod, if you wanted to know where it falls on the list above, but it is more of a tool to add to any of the above mentioned sharpening systems to further refine your edge when sharpening.
Strops can be purchased, but are simple enough to build yourself. I am not talking about a strop like the one you saw the barber put his straight razor to in that western you watched last Friday night. I recommend a strop built similar to a bench stone.
Obtain a strip of leather about 1-1 ½” wide and 12-16”. The leather can be a new piece you purchase at leather store, or an old but in good shape leather belt from a second-hand store. You want a belt with no carving or tooling on it, just smooth. Color does not matter.
Look at the strip of leather and recognize the two sides to it. One side should be smoother than the other (if it is a belt this will be the outside worn away from the body), and if you look closely, you might see small holes in it. These holes are where the hair grew.
You want to glue (rubber cement works well) the leather strip down to a strip of wood a few inches longer and slightly wider than the leather. You want the rougher side against the wood strip with the smoother side up.
I like to leave about 2” of wood at each end of the strop beyond the leather as a place to put the jaws of a clamp to secure it to a benchtop, counter or table. You can choose to not secure your strop and hold but hand, but I feel this can be unsafe and may result in cutting your hand during use. You may also choose to mount your strop in a bench vise which is viable but does bring you knife’s edge dangerously close to the hard metal of your vise.
The strop can be used bare, or you can load it with some white rouge or green chrome buffing compound.
(Check back for a post on how to use a strop in the future.)
So those are my quick recommendations on sharpeners.
A lot more could be said on each type of sharpener, or on other tools, but I did not go into a lot of detail because I wanted to keep it simple. If you have any questions, just email them to me and I will do my best to answer your queries.
